MusicOne Windows · TrafficONE
Add the Station Logo to Invoices
Add your station logo to your TrafficONE invoices.
Updated
This video shows how to add your station logo to your TrafficONE invoices.
Watch the video on YouTube: TrafficONE - Adding Your Logo to your invoices
Add your logo to TrafficONE invoices
Prepare the logo as a BMP file
Go to your System Settings. There’s an empty space there for a logo.
Double-click the station logo space. A dialog box opens. If your logo doesn’t show up in it, that’s because the logo needs to be in BMP format.
If your logo is a PNG, open it in Paint (in Windows 10 that’s Paint 3D). A solid white background works best, and a logo of 800 x 400 pixels seems to work best.
Choose File > Save as > Image, and pick BMP (bitmap).
Back in TrafficONE, the BMP file now shows in the dialog box. Select it, open it, and click OK. The logo is in.
Set the billing defaults
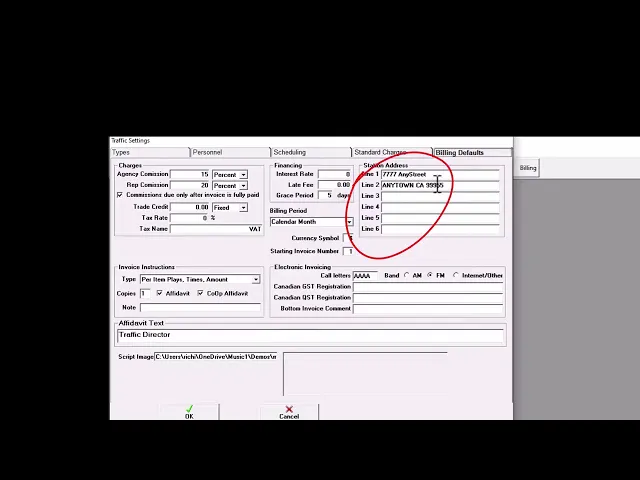
Under Traffic Settings you’ll also find Billing Defaults. Here you can enter:
Your station address, up to six lines.
Your default invoice instructions.
Your call letters, if you have them, and whether you’re FM, AM, internet or other.
A bottom-of-invoice comment, for example "Prompt payment is appreciated."
A text for someone to sign.
A script image. This image goes at the bottom of the invoice. You can put a logo there too; in the video Steve uses the same logo.
Print an invoice
Go to Billing and open the invoices you’ve already issued.
Choose an invoice. You can adjust it here if you want to add anything.
Select it and click Print.
Choose the invoice type (Steve picks Amount), click OK, and print the selected invoice.
Open the printed invoice and you’ll see the logo at the top, and the script image at the bottom, near the charges.